Common errors while upgrading wordpress to a new version
Upgrading wordpress
Upgrading WordPress improves security by patching vulnerabilities and ensures compatibility with new features, themes, and plugins. It also enhances performance and fixes bugs for a smoother user experience. However, when upgrading, you may face with several challenges or error which we will discuss here.

Server Connection Issue
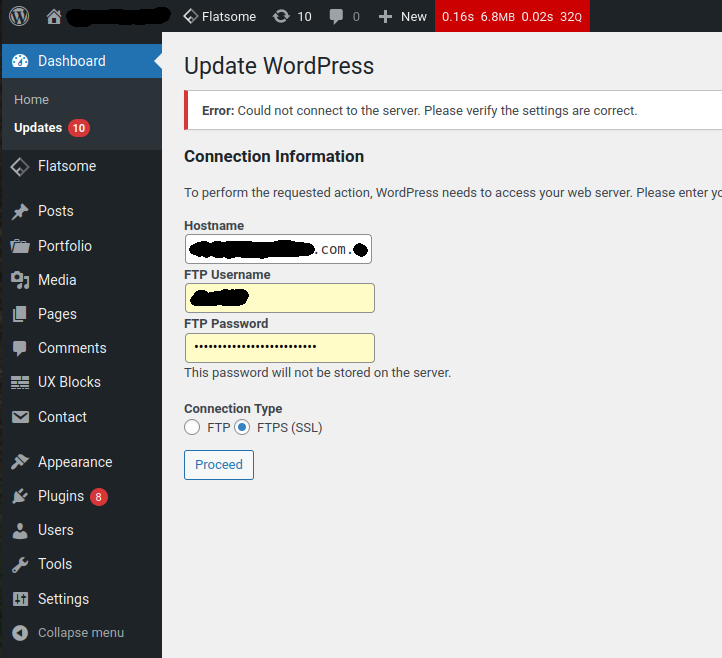
One of the common errors observed while upgrading is this error indicating the wordpress cannot connect the server:
Error: Could not connect to the server. Please verify the settings are correct.
I know this is too basic but some admins mistakenly enter the wordpress username/password for authentication. This is wrong. Wordpress is asking about SFTP authentication. You need to first setup a SFTP user and then add an appropriate configuration at wp-config.php for example:
define('FS_METHOD', 'ssh2');
define('FTP_USER', 'sftpuser');
define('FTP_PASS', 'your-password');
define('FTP_HOST', 'localhost');
define('FTP_SSL', false);
Directory creation issue
Another common error during wordpress upgrade is
Could not create directory
This error indicates that wordpress cannot create a folder due to folder permission settings.
A potential solution could be assigning permission 775 to the folders as follows:
sudo find /var/www/html/wordpress -type d -exec chmod 775 {} +
But, sometimes this is not enough and you need to add your sftp user to the www-data group as follows:
sudo usermod -aG www-data sftpuser
Another update lock
When an update fails it can block consequent update request with this error message:
Another update is currently in progress
To overcome this problem, you will need to manually remove the lock from database as follows:
sudo mysql
use <your-database-name>
DELETE FROM wp_options WHERE option_name = 'core_updater.lock';
exit
When wordpress upgrade times out
Upgrading wordpress is a heavy process. It can easily reach a timeout and you will be left with a blank screen. You will be challenged with three sources of timeout
- Nginx server timeout
- PHP timeout
- Wordpress timeout
Nginx timeout
To increase the nginx timeout, you need to edit the nginx.conf file as follows
sudo nano /etc/nginx/nginx.conf
In the http block, write these parameter settings:
client_header_timeout 300;
client_body_timeout 300;
keepalive_timeout 300;
send_timeout 300;
proxy_connect_timeout 300;
proxy_send_timeout 300;
proxy_read_timeout 300;
fastcgi_read_timeout 300;
Do not forget to restart nginx so the new parameters will be in effect:
sudo nginx -t
sudo systemctl restart nginx
PHP timeout
To increase your PHP timeout, first find your PHP config file:
sudo find / -name php.ini
Then, edit the php.ini, for example:
sudo nano /etc/php/8.3/fpm/php.ini
Set the parameters with higher tolerance of time and size such as
max_execution_time = 300
max_input_time = 300
memory_limit = 256M
upload_max_filesize = 64M
post_max_size = 64M
And do not forget to restart PHP so the new parameter changes will become effective:
sudo systemctl restart php8.3-fpm.service